Welcome to Typed, the workspace that makes your documents make sense. Your new Typed workspace is about to make your life a whole lot easier.
Once you’ve created your account, you’ll need to get familiar with Typed’s core features. This article will walk you through all the main aspects of Typed you need to get started.
The Typed Space
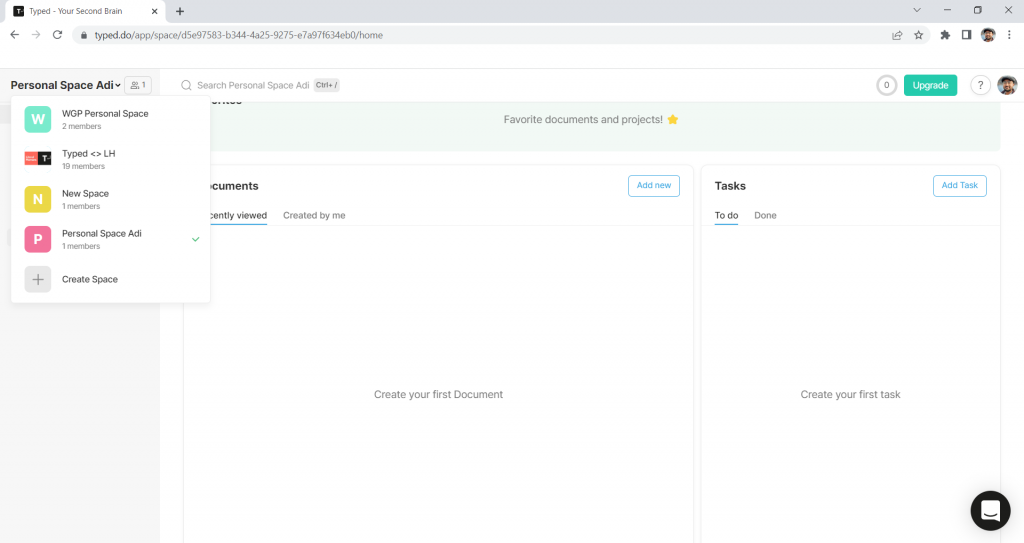
Everything in Typed happens within Spaces, which help you stay organized by separating different documents and projects. As a new Typer, the first thing you’ll need to do is set up your Typed Space for work.
The possibilities here are pretty much endless. You can create a Space for each project you’re working on, one for each client, or Spaces that separate documents by theme. You could even have one Space for personal documents and others for work-related ones.
Your Typed Spaces can either be private or shared with your team. In a private Space, only you have access to your Typed documents. Adding your teammates allows them to view, edit, and comment on all the documents in that Space depending on the permissions you’ve set.
To add collaborators to a Space, click the icon next to the Space title and select ‘Add Members.’
Then, add your teammates using their email addresses. You decide whether they’re viewers or editors, so you have complete control over your documents.
The Anatomy of Your Typed Home
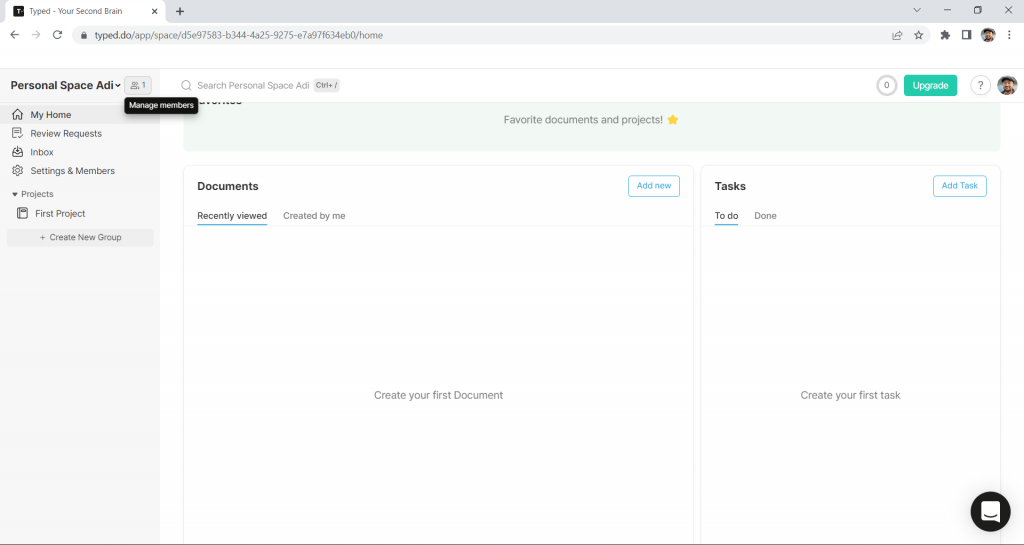
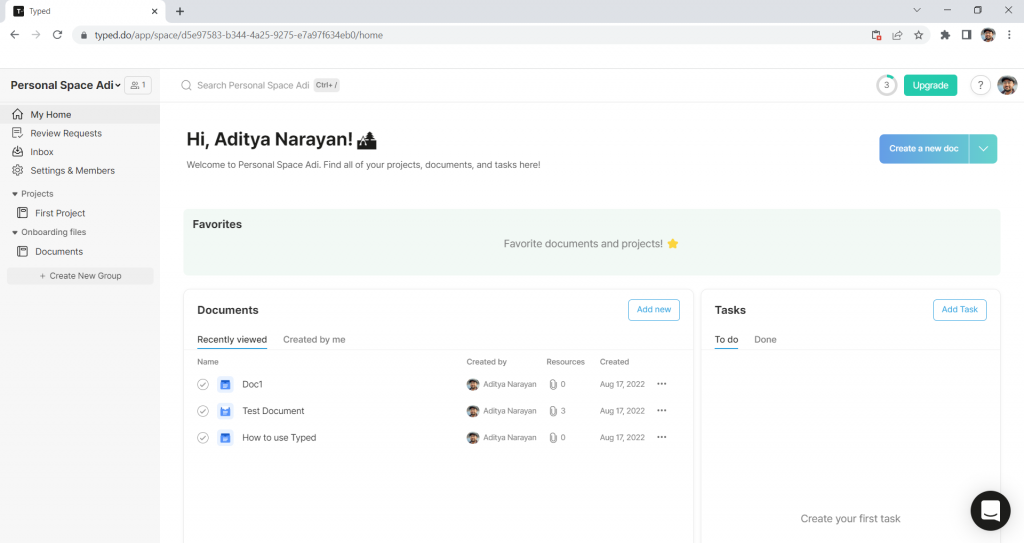
The homepage of a Typed Space is called ‘My Home.’ This is where you can view and navigate between all your projects, documents, and tasks.
Let’s start with a brief overview of the homepage so you can find your way around. Then, in the following sections, we’ll dive deeper into each feature’s details.
Inbox

Your Typed Inbox is not a place to receive messages. Instead, it’s where Typed stores all the reference documents you’ve added.
It acts as a temporary storage space for your references so you can quickly find and assign them to specific documents.
The Project Panel
The Project Panel is where the magic happens! This is where you can navigate all of your projects and the documents within those projects.
When you create a new project or document, it will appear here (documents are nestled under their parent projects).
Chat
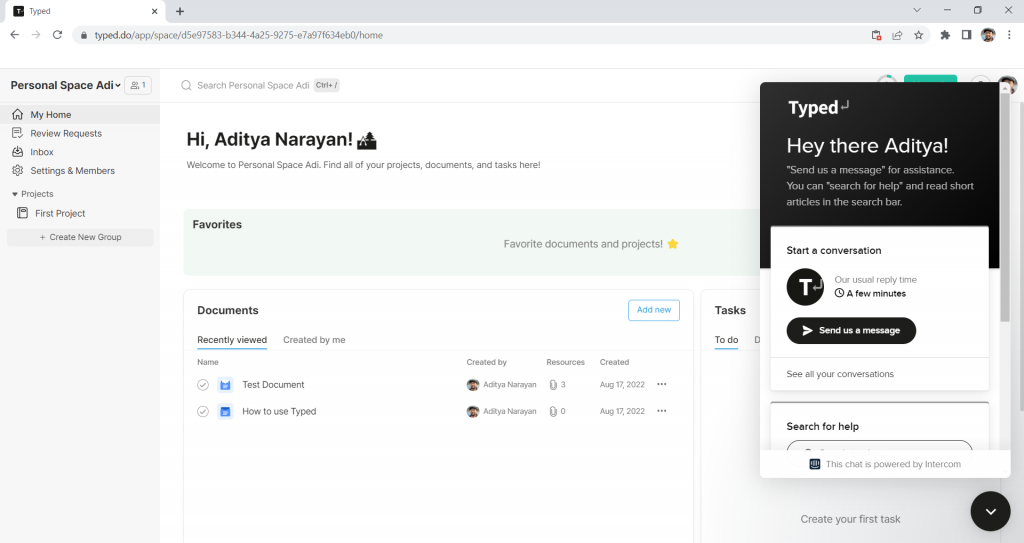
The Chat feature connects you with the Typed customer success team in real time so that you can access support as you use the platform.
“?” button
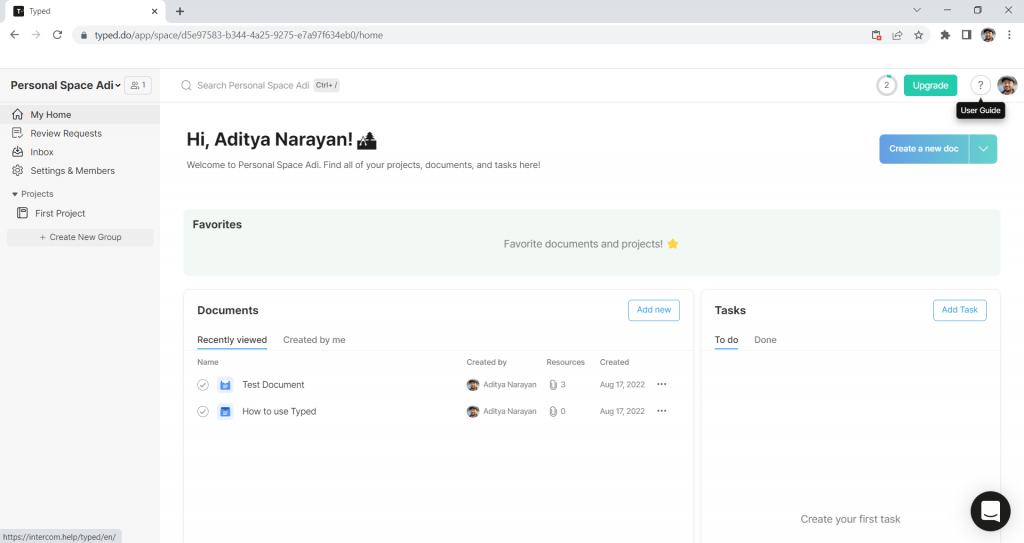
The help button, represented by a question mark, takes you straight to our Help Center, where you can access quick guides and video tutorials that showcase how to best use each feature of Typed.
Profile
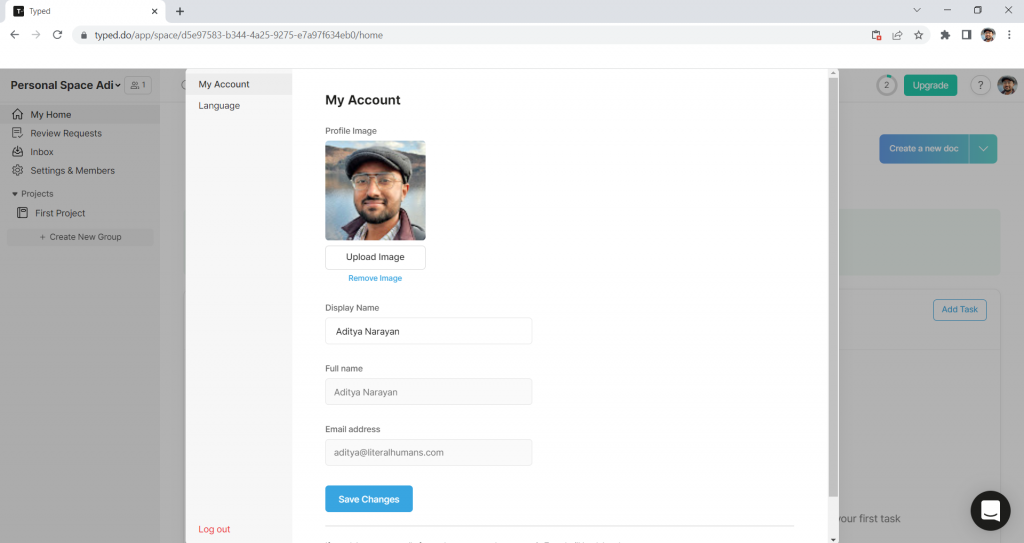
When you click on Profile, you can choose your username and change your profile image.
You also have the option to either log out of your Typed account or change your language settings (currently, the options are English or Korean).
Settings and Members
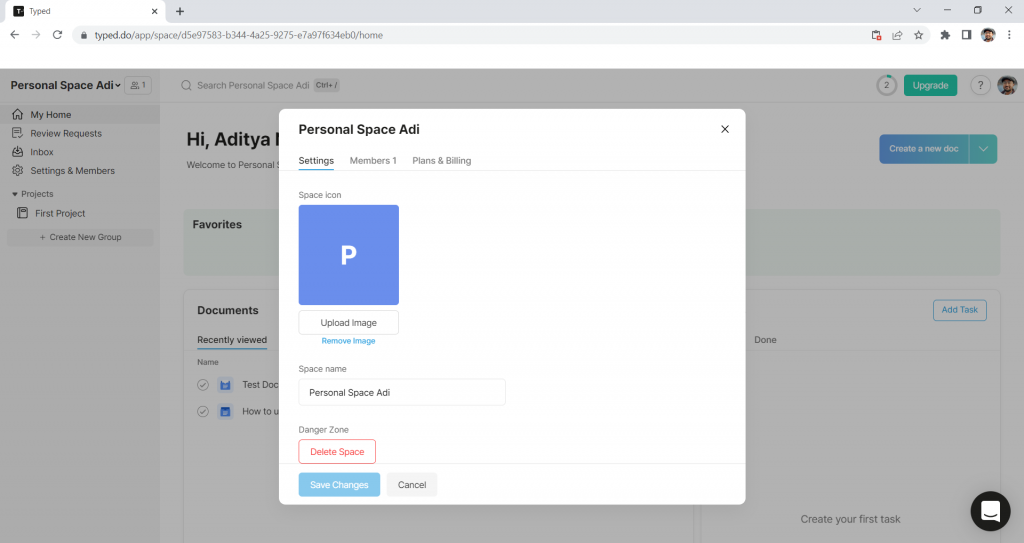
This is where you can take care of all the general admin of your space, including:
- Editing your Space name
- Changing your Space icon
- Deleting a Space (if you’re the Space owner)
- Inviting and editing member permissions
- Upgrading your plan or changing your billing information
Typed Essentials
Now you know your way around the Typed Home, let’s take a closer look at how to use its core features.
Project Groups
A Typed Project Group is the second level of organization within the Typed hierarchy. Within each Space, you can group similar or related Projects together according to your needs.
For example, if you’re a startup with a shared Typed Space for the whole company, one Project Group might be titled ‘Marketing’ and another ‘Sales’.
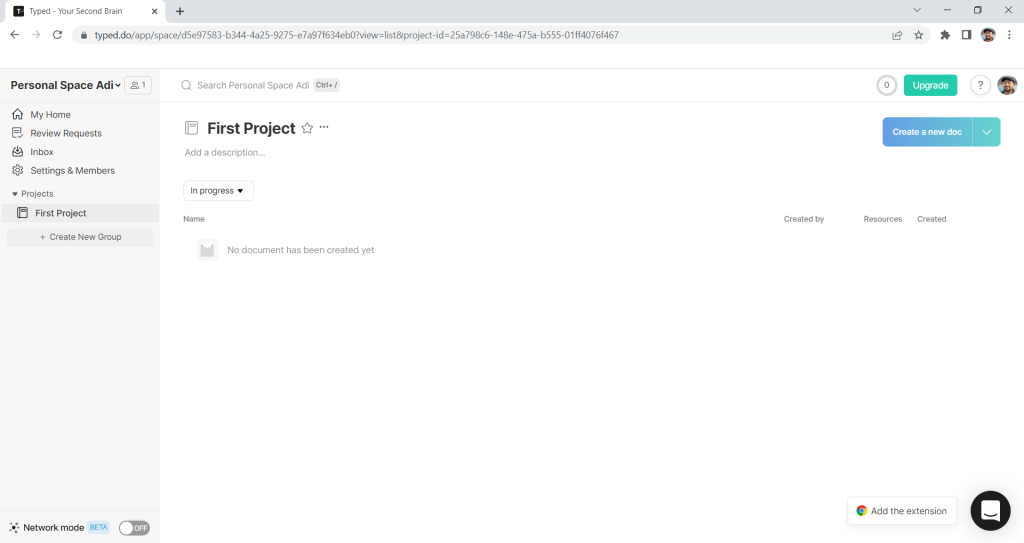
Projects
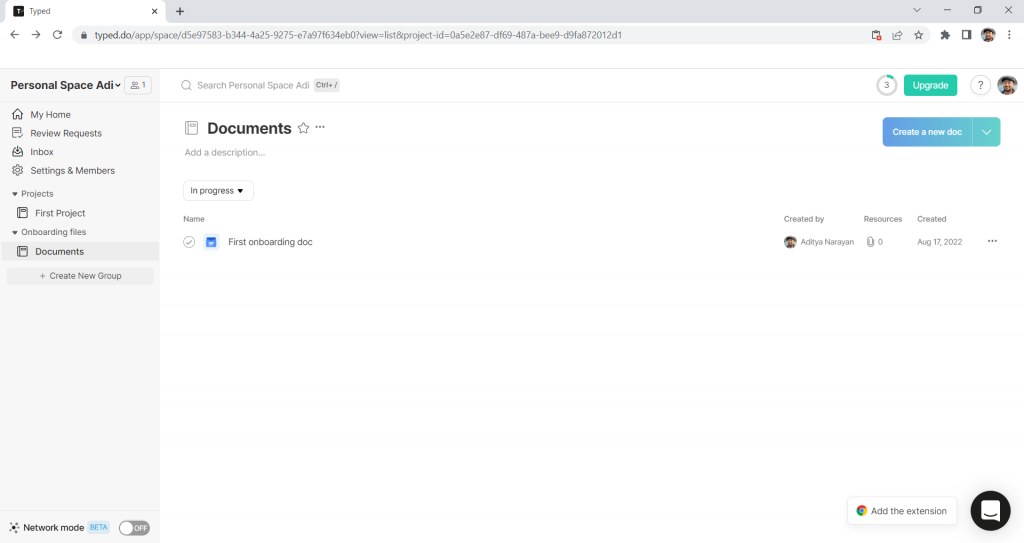
A Project is the next level of organization for your documents. When you click on a Project in the Project Panel, all the documents and tasks that are a part of that project will appear.
There are a number of ways to add a document to a project. You can create the document from within the Project or drag and drop it from another Project within the same Space. You can also upload a document from your local device, or add one from your Google Drive (Typed completely syncs up with the Google Drive of the account you used to sign up to the platform).
To easily access the projects that you use the most, click the star icon next to a project title to save it as a Favorite. This will then appear at the top of your Typed Home.
The Inbox

Let’s revisit the Inbox in a little more detail.
The Inbox is a pool of resources you haven’t yet allocated to specific documents.
These resources can be any documents, images, web pages, PDFs, or videos that you need to provide information or context to the document you’re working on.
You can either assign a reference to a particular document or leave it unassigned and keep it in your Inbox. This is particularly useful when you are in research mode and want to keep a resource for future reference in a document you’re going to write later.
You can also access the references sitting in your Inbox directly from the Resource Library of any document you’re working on.
The Document
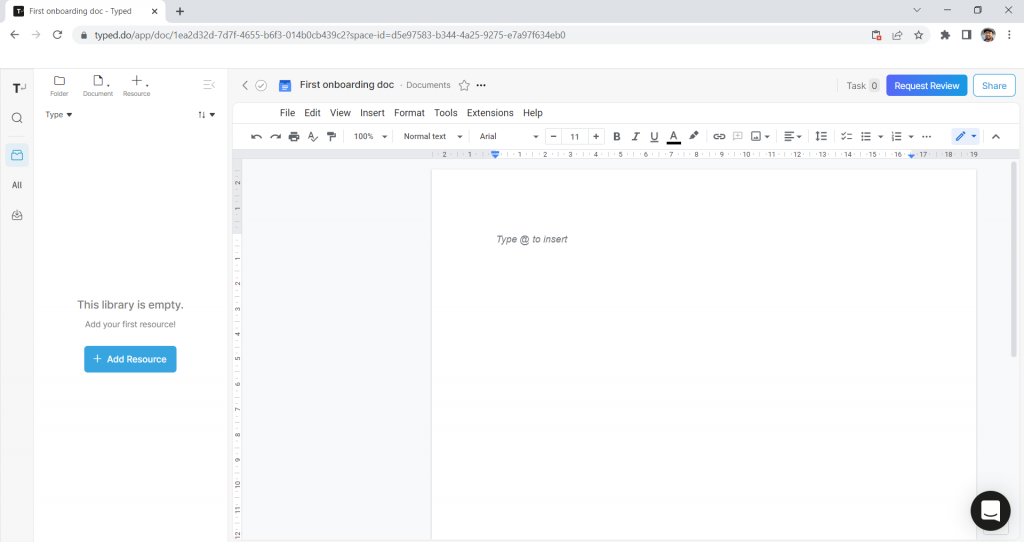
Typeds documents are where all your hard work actually happens!
To add a new document to a project, click ‘Create a new doc’ in the top right of your Typed homepage screen. Select from Google Docs, Sheets, or Slides, add a title, and file it under the corresponding project.
Alternatively, upload an existing document from your computer or import it from your Google Drive. Now you’re ready to get to work!
You’ll notice that your Typed documents use almost exactly the same interface as Google Docs, but with the addition of a number of powerful tools and features. This provides Typed users with the same Google interface they know and love, but with all the extra functionality of a next-generation document editor.
The Resource Library
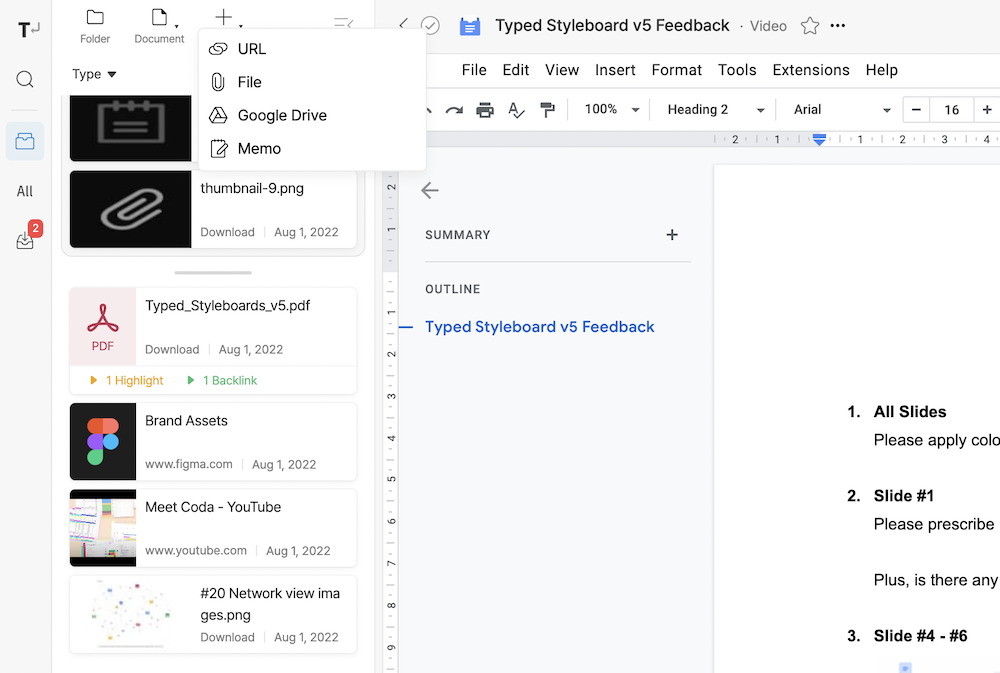
Every document in Typed comes with its own Resource Library. It’s here that you can add all the information you need to work on a particular document. This can include other documents, web pages, PDFs, videos, images, and even Memos that you create directly within Typed.
To add a resource, click on the big + icon in the top left of your screen. You can then either add a resource via a URL, by uploading from your local device, from Google Drive, or by creating a new Memo.
To add a new document, click on the document icon in the top left of the screen. You can then either import documents from your local device, from Google Drive, or create a new one from scratch.
And if you want to add a past document or resource to your current document’s Resource Library, you can use the ‘Search’, ‘Inbox’, and ‘All Resources’ features that sit on the far left of a document’s editor screen, underneath the Typed icon. These are an incredibly powerful trio of features, ensuring you always have every document and resource that your team has worked on in the past right at your fingertips, with no information silos or wasted work.
Search allows you to search all of the documents and resources in your Typed Space for specific files based on their titles. The All Resources icon gives you a dropdown menu of every Project and Document in your current Typed Space. And the Inbox is where you’ll find all of the resources you’ve saved to your Inbox and not yet assigned to a document.
Resource Folders
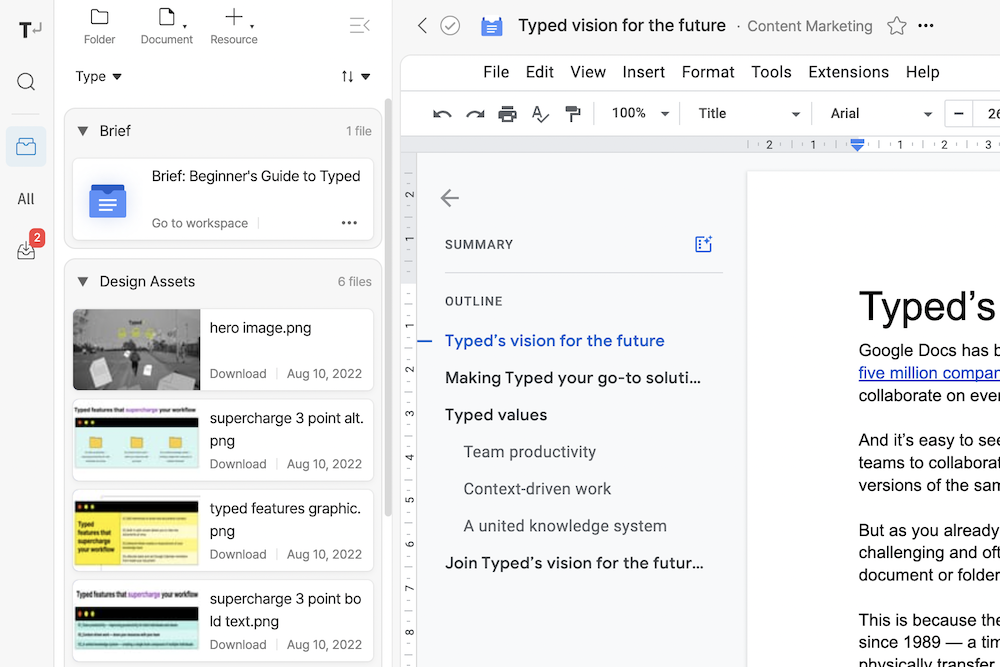
When you’re working on a really research-heavy document, you’ll often have 20+ resources in your library. To help you keep everything neat and tidy, you can group resources together in different collapsable folders.
To add a folder, simply click on the big folder icon in the top left of your screen, give it a name, then drag and drop the relevant resources you want to group together into it.
Split Viewer
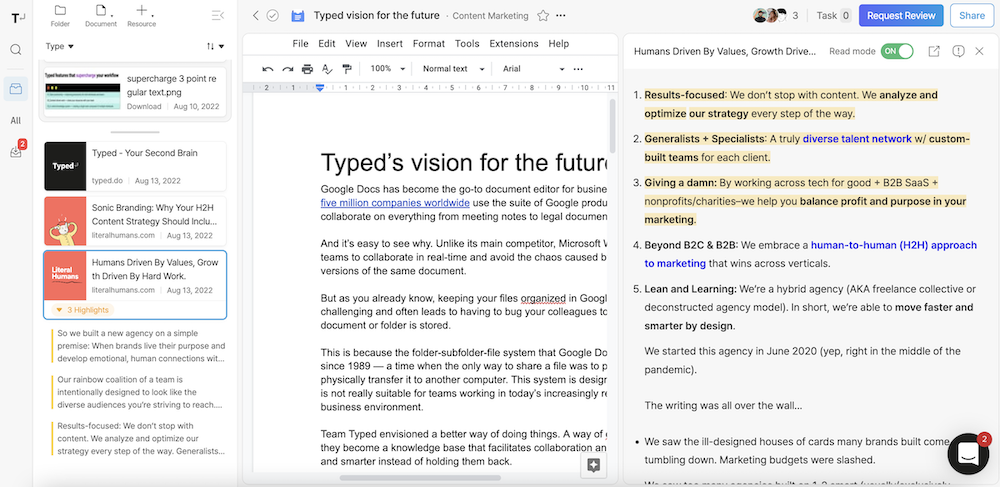
Once you’ve got all the different docs and resources neatly organized in your Resource Library, it’s time to start using them!
When you click on a resource in the Resource Library, Typed’s Split Viewer will open that document so you can browse through it and pull out the information you need. When you’re done, simply click the x icon to close the resource and you can carry on editing your main document.
The Split Viewer was specially designed to help Typed users escape the inefficiency of working on a document with 50 tabs open on their browser. Instead, upload everything you need into your Resource Library and work from one single source of truth!
Share
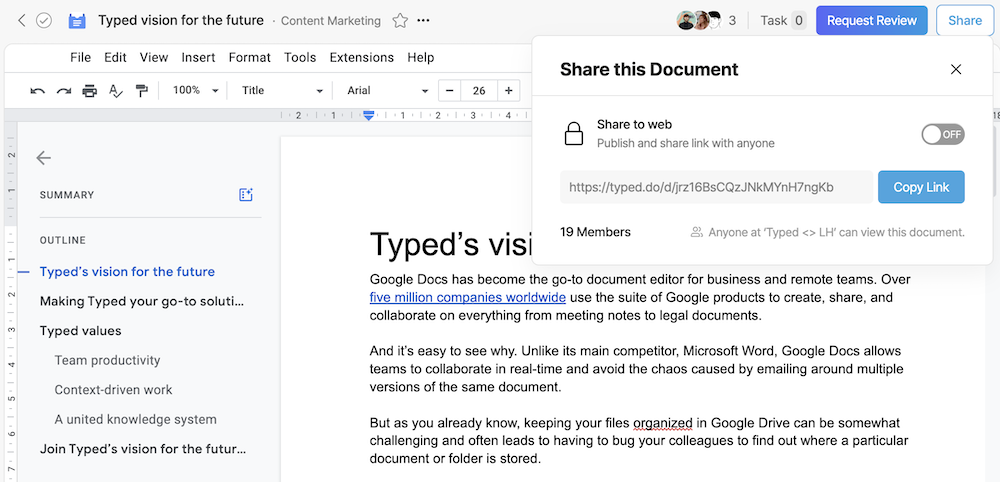
When you share a document in Typed, you not only share the finished document, but everything in its Resource Library as well. This allows Typed users to share the full context behind each piece of work.
You can either choose to share the document with other Typers in your Space, or publish the document and generate a link that anyone on the internet can use to view.
Advanced Typed Features That Will Supercharge Your Workflow
The following advanced features of Typed will help to take you and your team’s productivity to the next level.
Knowledge Network
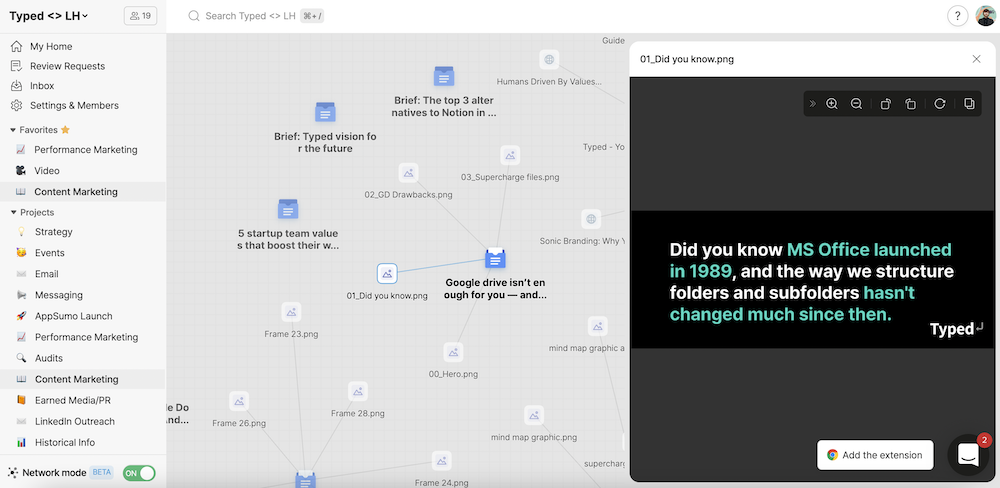
The relationship between every document and resource in a Project is tracked in Typed’s revolutionary Knowledge Network. To access the network, click on any project in a Typed Space, and toggle ‘Network Mode’ on in the bottom left-hand corner of your screen.
From here, you can see how all of the documents and resources in that Project are linked together, and browse everything visually. You can even preview each document and resource by clicking on it, allowing you to quickly find the files you need, never lose important resources, and never redo a piece of work again.
Tasks
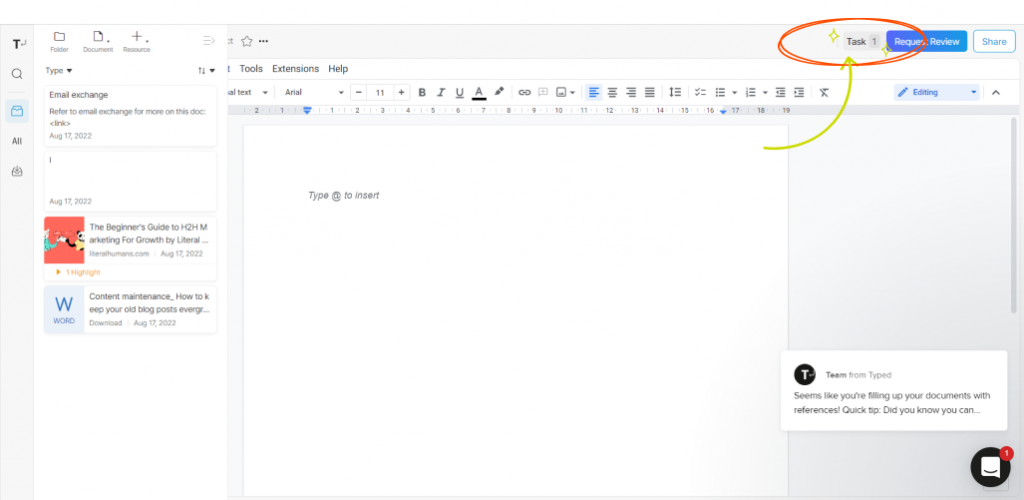
Typed’s Tasks feature is the only task manager you’ll ever need, adding a lot of the power of project management tools like Asana or Monday.com directly into your docs. You’ll find the Tasks feature at the top-right of all your Typed documents.
To set a task for yourself or a teammate, simply click on this button to open the task manager bar. Then, all you have to do is create a task, add an assignee, and set a deadline. You can set notifications to appear in the document or project, and even push them to your Google Calendar.
Highlights
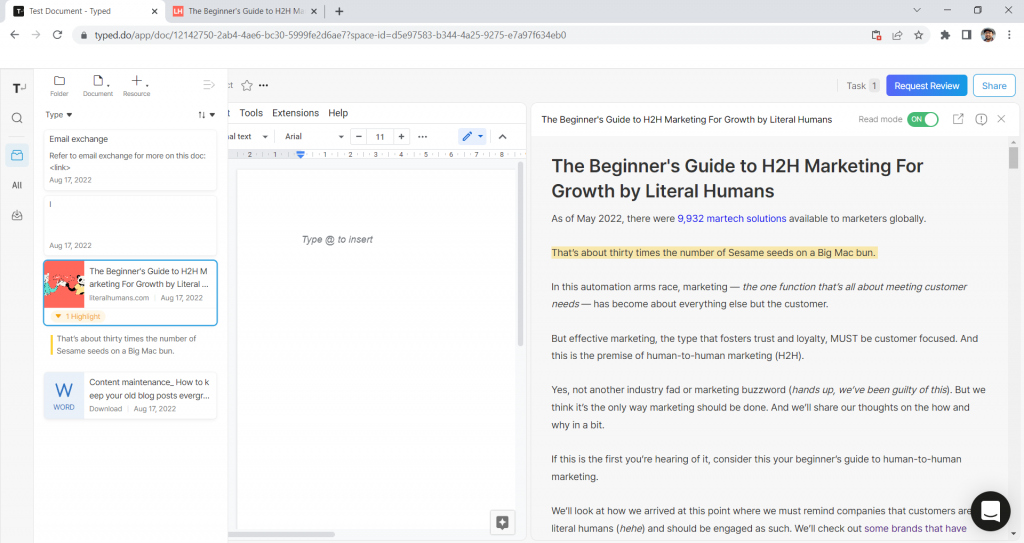
The Highlights feature will save you tons of time finding the relevant information from the resources you’re using in a document.
Use it to highlight key bits of text in your resources for ease of use later on. To activate the Highlights feature, turn on “Read Mode” on your split screen viewer.
Then, highlight the text you want to save, and Typed will save it automatically under the corresponding reference. Your highlights will appear under each reference in the Resource Library, meaning you can pull key stats and quotes without re-reading an entire resource.
Review Requests
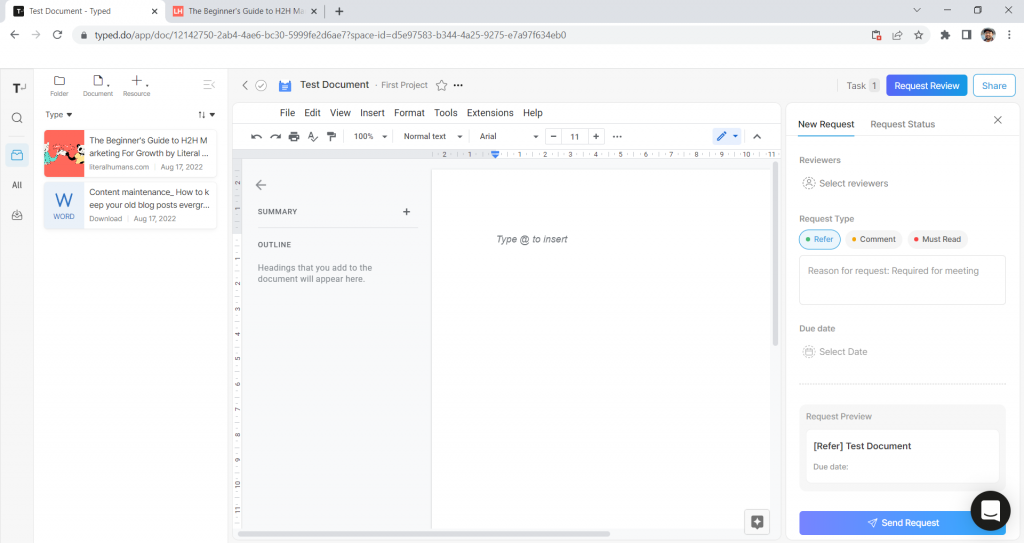
With Review Requests, you can ask team members to review your work or see review requests from your colleagues. You can find all of the review requests that you have outstanding in your Typed Home.
The Web Clipper
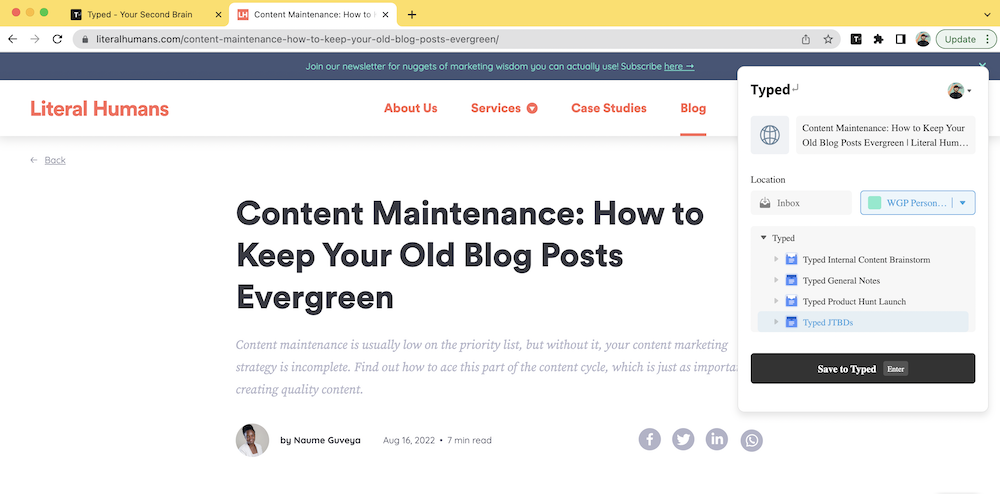
Typed’s Web Clipper is a lightning-fast Chrome extension that allows you to instantly add the online resources you’re browsing into Typed. To save any URL, simply click on the Web Clipper icon and save it as a resource within a document’s resource library or you can just save it to the Inbox for later.
You can download the Typed Web Clipper extension here.
Typed App
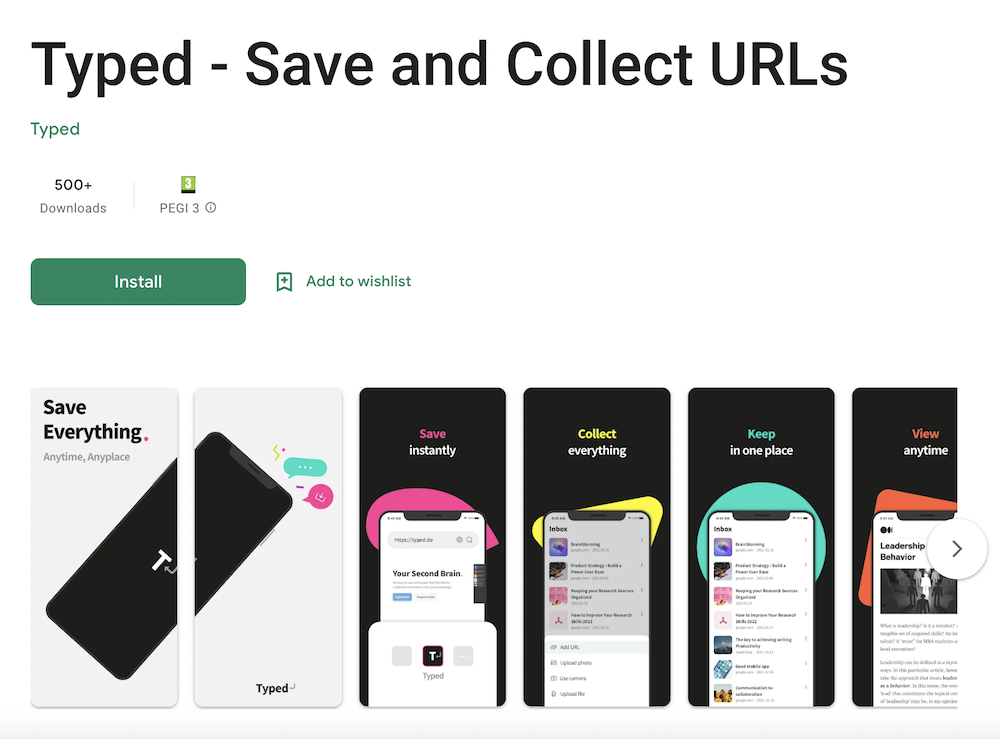
The Typed App allows you to carry on working with Typed while on the go. All the resources you save while using the App will appear in the Inbox of your Typed Space.
Download it on the Google Playstore, or on the Apple App Store.
The Future of Documents is Here
Typed is here to bring order to the chaos of your workflow and make your documents quicker, smarter, and more powerful. Our ultimate goal is to save you, our wonderful users, time and sanity by supercharging the productivity of your work.
Typed is an essential part of every company tech stack — especially for startups that generate hundreds of documents every day, from pitch decks to policies and everything in between.
If you’re already a Typer, congratulations and welcome to the future. If not, what are you waiting for? Sign up for free today and join the Typed revolution.